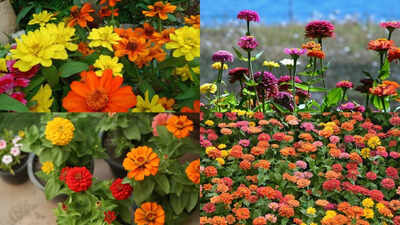
There’s a particular kind of quiet sadness that sets in when your zinnia patch, which spent all summer bursting with colour, starts looking tired, faded, and a little sparse as the season winds down. It’s tempting to just leave everything as is or yank the whole bed out in frustration, but what you do in these final weeks actually matters, both for next year’s flowers and for how tidy your garden looks heading into the cooler months. Zinnias are annuals, meaning this particular batch of plants won’t come back regardless of what you do, but a few smart end-of-season decisions can set you up for an even better display next year, often without spending a single rupee on new seeds. Here’s exactly what to do once your zinnias have finished their run.
First, decide: seeds or a tidy garden?
Before you do anything else, this is the fork in the road that determines everything that follows. If you’ve been deadheading all season to keep the blooms coming, you’ll need to stop that habit on at least a few of your healthiest, most vibrant plants and simply let their flowers fade, dry, and turn brown right there on the stem. Choosing your best-looking, most disease-free flowers for this matters, since whatever seeds they produce will largely determine what next year’s plants look like. If you’re not interested in saving seeds at all, you can skip straight to cleaning up the bed instead.
How to properly harvest zinnia seeds
Once you’ve picked your seed-saving flowers, patience is really the only skill required. Let the flower heads dry out fully on the plant, ideally through at least a week of warm, dry weather, until they turn brown, papery, and brittle to the touch. Snip the dried heads off with clean scissors or shears, then pull the petals apart to reveal the seeds underneath, look for ones with a distinct arrow-shaped tip, since that’s your sign they’re mature and viable. If the weather’s turned wet or birds are getting to them first, bring the heads indoors and let them finish drying in a paper bag for one to two weeks instead.
Don’t toss spent flower heads into your home compost
This is a genuinely easy mistake to make, and one that comes back to bite most gardeners the following spring. Zinnia seed heads that have gone brown are absolutely packed with seeds, and most home compost piles simply don’t get hot enough to kill them off during the composting process. Toss them in anyway, and you’ll likely find volunteer zinnia seedlings popping up everywhere you later spread that compost, which sounds charming until you realise they’re growing in your vegetable patch instead of where you actually wanted flowers.
Decide whether to pull the plants or leave them standing
Once the season’s genuinely over and the first frost has knocked the plants back, you’ve got two reasonable options. Pulling the spent plants out entirely gives you a clean, tidy bed ready for spring, and it’s generally the better choice if you experienced any disease issues, like powdery mildew, over the season. Alternatively, leaving the dried plants standing lets any remaining seeds drop naturally for possible self-seeding next year, and gives seed-eating birds a genuine food source through the colder months, though the bed will look considerably messier in the meantime.
Clean and prep the bed for next season
If you’ve opted to clear the bed, remove the old plant debris fully rather than leaving broken stems and roots behind, since decaying plant material can harbour the very fungal spores responsible for powdery mildew, a common zinnia problem, into next year. Working a bit of compost into the soil at this stage helps replenish nutrients the zinnias used up over the season. It’s also worth noting where powdery mildew or pest issues cropped up this year, so you can plan slightly wider spacing between plants next season to improve airflow.
Store your saved seeds the right way
Once your harvested seeds are fully dry, brush away any remaining petal debris and store them in a paper envelope rather than anything airtight or plastic, which can trap residual moisture and cause mould. Label each envelope clearly with the variety and the date collected, since zinnia seeds typically stay viable for a few years if stored properly. Keep the envelopes somewhere cool and dry over winter, and by the time spring rolls around, you’ll have a free, ready-to-sow batch of seeds for the exact zinnias you already know you love.
Disclaimer:
This article is intended for general informational purposes only. Seed viability, self-seeding success, and disease risk can vary depending on your specific climate, zinnia variety, and growing conditions. Seeds saved from hybrid zinnia varieties may not grow true to the parent plant, so results can differ from the original flowers. It’s advisable to consult a local nursery or horticulture expert for guidance tailored to your region.