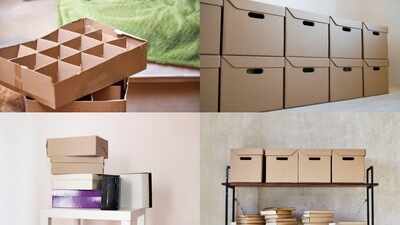
Those delivery boxes piling up in the corner don’t have to head to the recycler just yet. I used to flatten and toss every one of them, until I realised how much storage was sitting right there for free. With a bit of paper, some glue and an hour or so, an ordinary box can become a sturdy organiser for your shelves, wardrobe or the kids’ toys. Here’s how I’d do it.
Before you start: gather your supplies
You don’t need much. Collect a few boxes of different sizes, scissors or a box cutter, strong tape, glue or a glue stick, and something to cover the boxes with. Wrapping paper, newspaper, kraft paper, scrap fabric or leftover wallpaper all work well. A ruler and a pencil help if you want neat, even cuts.
Pick your box and tidy it up
Choose a box that’s still firm, with no damp patches, tears or strong smells. Boxes from groceries or electronics are usually the sturdiest. Peel off old tape and shipping labels, then trim the top flaps. You can cut them off completely for a simple open box, or fold them inward and glue them down for a cleaner, stronger edge.If the sides feel a little wobbly, run a strip of strong tape along the corners and the base. It takes two minutes and makes a big difference once the box is loaded. For a lid, cut a piece of spare cardboard slightly larger than the opening and fold down the edges.
Cover it up
This is where the box stops looking like a box. Brush a thin, even coat of glue onto one side, press your paper or fabric on and smooth out any bubbles with your hand. Work one side at a time, then fold the material neatly over the top edge and tuck it inside. Wrap the corners like a gift, so there are no loose bits.Don’t have any paper to spare? Two coats of paint do the job just as well. Let the first coat dry fully before adding the second, and you’ll get a smooth, even finish.
Add the finishing touches
Now make it yours. Stick on a handle made from jute rope or a strip of fabric, add a small label so you know what’s inside, or finish with ribbon, stickers or a stencilled pattern. Let everything dry completely before you fill the box. If it will get plenty of use, a coat of clear sealant protects it from scuffs and spills.
Where to use them
- Wardrobe shelves for scarves, socks and accessories
- Kids’ rooms for toys, books and craft supplies
- The kitchen for packets, spices and spare containers
- Your desk for stationery, cables and files
A few quick tips
- Keep heavier items in sturdier boxes and lighter things in the prettier ones.
- Match the colours to your room so the boxes look planned, not patched together.
- Store them away from damp spots, since cardboard soaks up moisture.
- Make a set in matching sizes for a tidy, uniform look on open shelves.
Why it’s worth it
These boxes cost next to nothing, cut down on waste and give you storage that suits your space exactly. They’re also a lovely rainy-day project to do with children, who usually enjoy choosing the colours and decorating their own.Next time a delivery arrives, hold on to the box. It might just become your favourite new organiser.
Disclaimer:
This article is for general informational and creative purposes only. Results vary with materials and individual skill. Handle scissors, cutters and glue with care, and keep sharp tools away from children. Cardboard boxes are not suitable for very heavy loads or damp areas. Follow the manufacturer’s instructions for any paints, glues or sealants you use.